
Dimdima
Online Children's Magazine from India
Dimdima
Online Children's Magazine from India


Things Required
Scissors to cut plant parts, a spade to dig out herbaceous plants, a strong bag to store collections, newspapers, and a good clean board to mount specimens.
On a trip to Kerala after the Monsoons, the profusion of flowers and their beauty impressed me. I wanted to find a way to take them back with me to the city. I dried the flowers between the pages of my book. Not only did they leave the imprint of the petal on the page, they also dried into fragile wisps. I treasure them to this day.
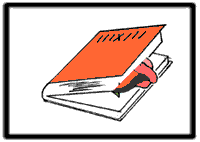
The technique of preserving plants (specimens) and mounting them on a piece of paper is called Herbarium. Luca Ghini from Bologna, Italy, was one of the first botanists to mount specimens on paper using gum in 1551.
By Rani Iyer
Make your own herbarium in three simple steps: collecting, drying and mounting.
Collecting: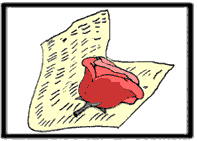 1. You will need scissors to cut plant parts, a spade to dig out herbaceous plants, a strong bag to store collections, newspapers, and a good clean board to mount specimens.
2. Small branches of trees, shrubs, and herbs that are free from disease and insects are cut and stored in the plastic bag. If the herbarium is to have some scientific value then you should tag every plant with its name. Make notes in an observation book about the date, location, the color of flowers and fruits, and other interesting information.
3. If a plant has two different kinds of leaves or flowers, make sure to include them. Small herbs are usually uprooted and dried after shaking out the soil. Some flowers are delicate and don't last for more than a few hours. Pick such flowers early in the day and place them on paper for drying.
 Drying:
4. Create a folder using newspaper bundle. Gently spread the plant specimens to remove any overlaps. Every plant specimen should have paper on both the sides.
5. Put some heavy weight on the folder and leave it overnight.
6. Change the sheets everyday, taking care to transfer the specimens gently on to a neat sheet. Put the weight back. This step is the longest and can take many days or weeks depending upon the specimen and the season.
7. When the specimens are light, dry, and brittle they are ready for mounting.
Mounting: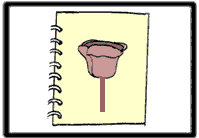
8. To mount a specimen, you will need several thin pieces of sticky tape. Tape only the stem and leave the delicate parts like flowers, fruits and seeds free.
9. Every mounted specimen needs a label. Prepare one with your name, date and location of collection, the color of flowers and fruits.
10. Identify the Latin name, family name for the specimen and write that down on the label.
Now you have your own herbarium! Herbariums need to be maintained carefully and watched for any silver fish and other insects. When they do appear, the specimens need to be sprayed with repellents.
EXPLORE MORE...
Dimdima is the Sanskrit word for ‘drumbeat’. In olden days, victory in battle was heralded by the beat of drums or any important news to be conveyed to the people used to be accompanied with drumbeats.
Bharatiya Vidya Bhavan
K. M Munshi Marg,
Chowpatty, Mumbai - 400 007
email : editor@dimdima.com
Bharatiya Vidya Bhavan
505, Sane Guruji Marg,
Tardeo, Mumbai - 400 034
email : promo@dimdima.com
Dimdima.com, the Children's Website of Bharatiya Vidya Bhavan launched in 2000 and came out with a Printed version of Dimdima Magazine in 2004. At present the Printed Version have more than 35,000 subscribers from India and Abroad.